Host Static Website on AWS S3 Using Terraform

I am an AWS Community Builder and a professional Cloud Engineer currently working as a consultant with a cybersecurity team. I'm passionate about helping people on their cloud journey and have earned several professional certifications, including CKAD, Certified Terraform Associate, AWS Certified Solutions Architect, and RHCSA. Follow my blog for more content and exciting giveaways!❤️❤️❤️❤️
In this blog, we will learn how to host a static website in AWS using the S3 bucket but with a small twist we will not deploy the website directly through the AWS console instead we will be using Terraform which is a popular Infrastructure as Code tool in DevOps. So if you are new to the AWS cloud services or Terraform then you don’t need to worry because in this blog I will explain each step briefly so that you can easily follow along.
To access all the scripts and setup files used in this blog follow this repository.
Prerequisites
Before we get started, make sure you have the following:
An AWS account
The AWS CLI installed and configured on your local machine
Terraform installed on your local machine
Step 1: Create AWS Backend in Terraform
To configure an AWS backend in Terraform, you need to create an S3 bucket. The S3 bucket will store the Terraform state file, which keeps track of all the resources created via Terraform. Create a file named backend.tf and copy the following content and save it.
terraform {
  backend "s3" {
    bucket         = "terraform-state2465"    # your-bucket-name
    key            = "Terraform-State"        # path/to/your/terraform.tfstate
    region         = "ap-south-1"             # your-region
  }
}
Replace your-bucket-name, your-region, and, key with your own values. key specifies the path and filename of the Terraform state file within the bucket.
Now, Initialize the backend: Run terraform init command to initialize the backend with the configuration you specified.
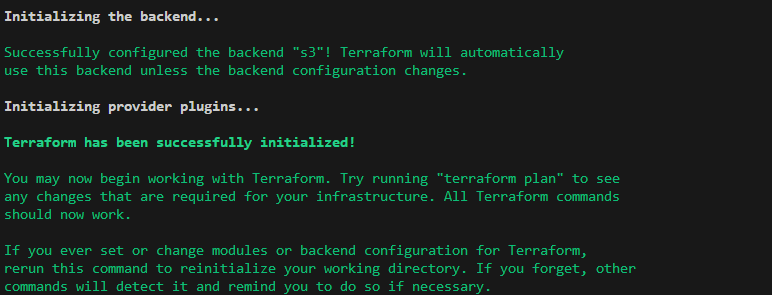
After successfully initializing the backend you will get the above success message which indicates that the backend has been initialized successfully. Now, Terraform will use S3 as the backend to store the state file.
Step 2: Create a Static website in S3
In this step, we will create an S3 bucket to host our static website. To do this using Terraform, create a new file called main.tf and add the following code:
# define aws region replace it with your region

variable "region" {
  default = "ap-south-1"
}

# aws provider block

provider "aws" {
  region = var.region
}

# S3 static website bucket

resource "aws_s3_bucket" "my-static-website" {
  bucket = "my-static-website46551" # give a unique bucket name
  tags = {
    Name = "my-static-website"
  }
}

resource "aws_s3_bucket_website_configuration" "my-static-website" {
  bucket = aws_s3_bucket.my-static-website.id

  index_document {
    suffix = "index.html"
  }

  error_document {
    key = "index.html"
  }
}

resource "aws_s3_bucket_versioning" "my-static-website" {
  bucket = aws_s3_bucket.my-static-website.id
  versioning_configuration {
    status = "Enabled"
  }
}

# S3 bucket ACL access

resource "aws_s3_bucket_ownership_controls" "my-static-website" {
  bucket = aws_s3_bucket.my-static-website.id
  rule {
    object_ownership = "BucketOwnerPreferred"
  }
}

resource "aws_s3_bucket_public_access_block" "my-static-website" {
  bucket = aws_s3_bucket.my-static-website.id

  block_public_acls       = false
  block_public_policy     = false
  ignore_public_acls      = false
  restrict_public_buckets = false
}

resource "aws_s3_bucket_acl" "my-static-website" {
  depends_on = [
    aws_s3_bucket_ownership_controls.my-static-website,
    aws_s3_bucket_public_access_block.my-static-website,
  ]

  bucket = aws_s3_bucket.my-static-website.id
  acl    = "public-read"
}


# s3 static website url

output "website_url" {
  value = "http://${aws_s3_bucket.my-static-website.bucket}.s3-website.${var.region}.amazonaws.com"
}
In this code, we are using the aws provider to configure the AWS region we want to use. We are then creating an aws_s3_bucket resource called my-static-website and specifying the bucket name, access control list, website properties, and, versioning.
Save this code to a file called main.tf and run the following command in your terminal:
terraform init
This will initialize your Terraform workspace and download the necessary plugins.
Next, run the following command to create your S3 bucket, and apply permissions to the bucket:
terraform apply
This will create your S3 bucket and apply the permissions to access the bucket publicly. You can access your website using the bucket URL, which is displayed in the output of the terraform apply command.
Step 3: Create a policy to manage the bucket permission
In this step, we will create an S3 bucket policy that allows anyone to retrieve objects from the bucket. We’re using the aws_s3_bucket_policy resource to create the policy and referencing the aws_s3_bucket resource that defines the S3 static website bucket that we created in the previous step. Create a new file called bucket-policy.tf and add the following code:
# S3 bucket policy
resource "aws_s3_bucket_policy" "bucket-policy" {
  bucket = aws_s3_bucket.my-static-website.id

  policy = <<POLICY
{
  "Id": "Policy",
  "Statement": [
    {
      "Action": [
        "s3:GetObject"
      ],
      "Effect": "Allow",
      "Resource": "arn:aws:s3:::${aws_s3_bucket.my-static-website.bucket}/*",
      "Principal": {
        "AWS": [
          "*"
        ]
      }
    }
  ]
}
POLICY
}
The policy document specifies a single statement that allows anyone (* principal) to retrieve objects (s3:GetObject action) from the bucket. The Resource attribute specifies the ARN of the static website bucket and uses interpolation to reference the bucket's ID.
After creating the S3 bucket policy in Terraform, you can apply the changes to your AWS account using the terraform apply command.
This will initialize the Terraform state and prompt you to confirm the changes. Review the changes and type “yes” when prompted to apply the changes.
Step 4: Upload your website content to the S3 bucket using the AWS CLI or the S3 console.
Now, Once you have created an S3 static bucket website and configured the bucket policy, you can upload your website content to the bucket using the AWS CLI or the S3 console. Here’s how to do it using each method:
AWS CLI
To upload your website content to the S3 bucket using the AWS CLI, follow the steps:
Navigate to the root directory of your website content. Use the aws s3 sync command to copy the files to the S3 bucket. For example:
aws s3 sync . s3://your-bucket-name --delete
This command syncs the contents of the current directory (.) to the specified S3 bucket (s3://your-bucket-name) and deletes any files in the bucket that do not exist in the local directory (--delete).
S3 Console
To upload your website content to the S3 bucket using the S3 console, follow these steps:
Navigate to the S3 service in the AWS Management Console. Select the bucket that you created for your static website. In the bucket overview page, select the “Upload” button.
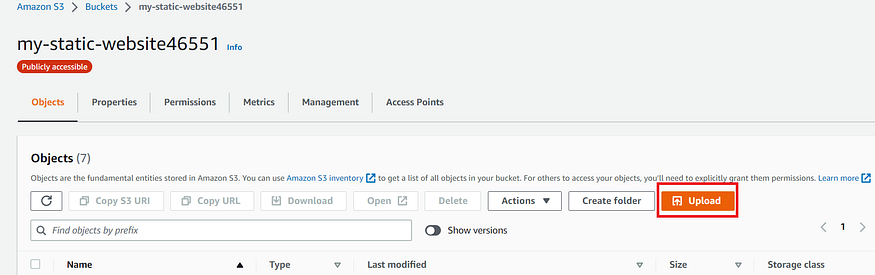
Click on the “Add files” button to select the files you want to upload from your local machine. You can also drag and drop the files directly into the S3 console.

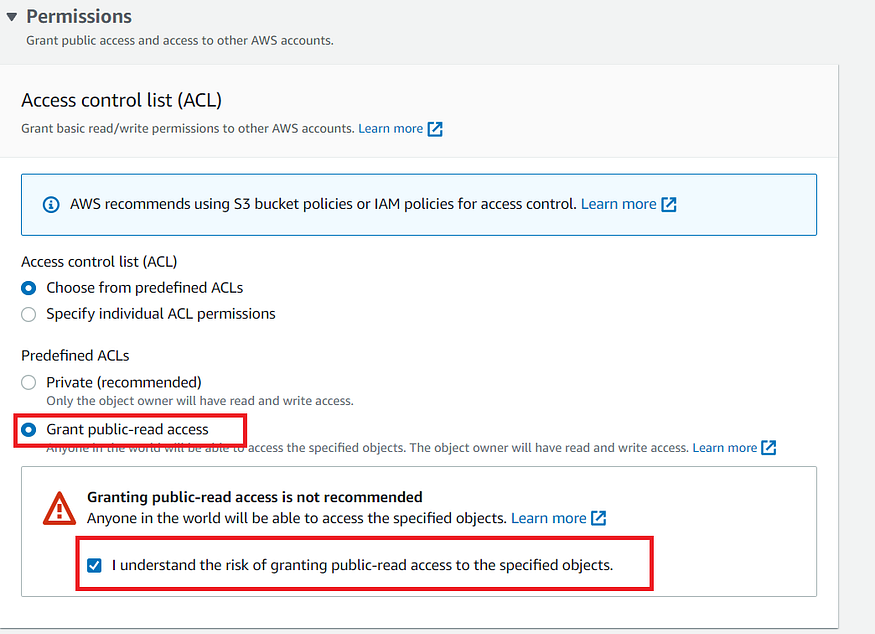
Once you have selected your files, scroll down and extend the Permission tab. Make sure that you select the “Grant public read access to this object(s)” checkbox so that your website content can be accessed by anyone on the internet.
Now, Click on the “Upload” button to start uploading your files. The upload progress will be displayed on the screen. Once the upload is complete, you should see your files listed in the S3 bucket.
That’s it! You have successfully uploaded your website content to the S3 bucket and made it publicly accessible.
Step 5: Access the Hosted S3 Static Website
To access the URL of your S3 static website after it has been created. You can then run the following command in your terminal to view the URL:
terraform output website_url
This will display the URL of your hosted website, which you can then open in your web browser.
Or else you can access the hosted S3 static website using the AWS Management Console, you can follow these steps:
In the bucket overview page, select the “Properties” tab.
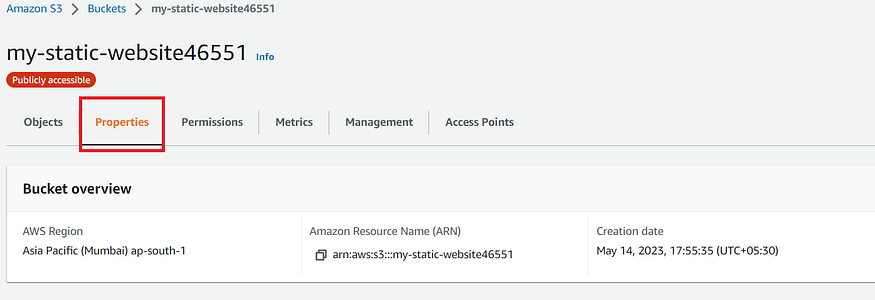
Under the “Static website hosting” section, you should see the URL of your hosted website under the “Endpoint” field. Copy the URL and paste it into your web browser to view your hosted website.
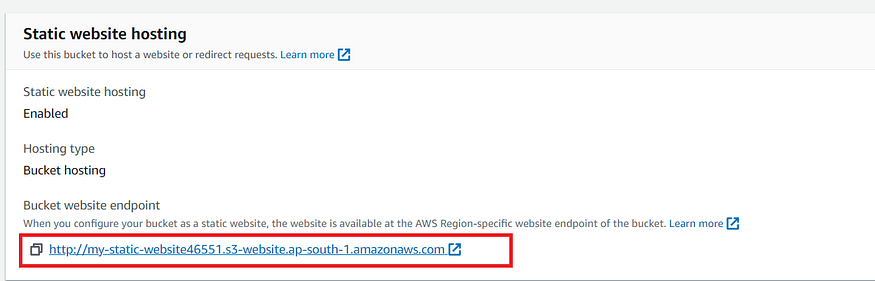
Alternatively, you can also access the hosted website by clicking on the “Endpoint” URL in the “Static website hosting” section, which will automatically open the website in your web browser.
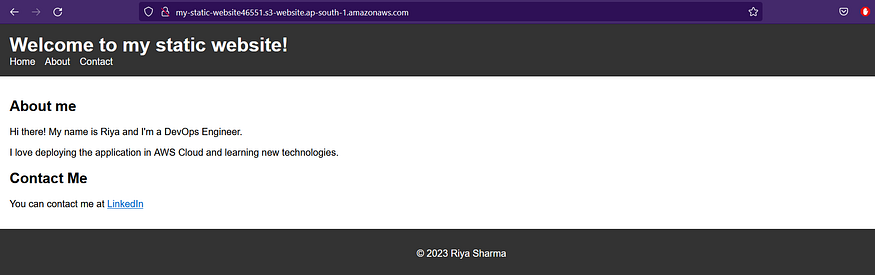
Finally, now you will be able to access our static web application which is hosted on an AWS S3 bucket using Terraform.
Conclusion
In conclusion, hosting a static website using Amazon S3 with Terraform is a straightforward and cost-effective way to publish your website on the internet. With Terraform, you can automate the process of creating and configuring your S3 bucket, defining the bucket policy to make your website accessible.
By following the steps outlined in this blog, you can quickly and easily create an S3 bucket to host your website, upload your website content using the AWS CLI or S3 console, and access your hosted website using Terraform output or the AWS Management Console.
Overall, hosting a static website on Amazon S3 with Terraform is a great option for simple websites that don’t require server-side processing or dynamic content. It’s also a cost-effective solution compared to traditional web hosting services, as you only pay for the storage and data transfer used by your website.
Follow-up
If you enjoy reading and would like to read more in the future. Please subscribe here and connect with me on LinkedIn.
You can buy me a coffee too🤎🤎🤎


