Setup CI/CD using GitLab Pipeline in AWS Lambda Function

I am an AWS Community Builder and a professional Cloud Engineer currently working as a consultant with a cybersecurity team. I'm passionate about helping people on their cloud journey and have earned several professional certifications, including CKAD, Certified Terraform Associate, AWS Certified Solutions Architect, and RHCSA. Follow my blog for more content and exciting giveaways!❤️❤️❤️❤️
Continuous Integration and Continuous Deployment (CI/CD) is a crucial aspects of modern software development, enabling teams to automate and streamline the release process. AWS provides a powerful infrastructure for hosting applications, while GitLab offers robust CI/CD capabilities. In this article, we will explore how to implement CI/CD in AWS using GitLab Pipeline, enabling you to automate the build, test, and deployment processes for your applications.
Prerequisites:
Before we begin, make sure you have the following:
An AWS account with the necessary permissions to create and manage resources.
A GitLab account with a repository containing your application’s source code.
Step 1: Set up an AWS Lambda Function
To get started, Create a Lambda function with node.js as the runtime environment you can select any runtime environment based on your application requirement.
Go to the AWS Management Console and navigate to the AWS Lambda service. Click on “Create function” to start the Lambda function creation process.
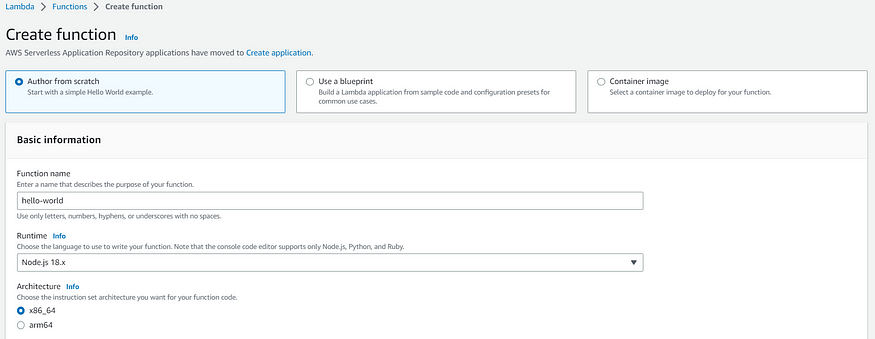
Then, choose the blueprint “Author from scratch” and Runtime as “Node.js 18.x” You can select the appropriate runtime environment (e.g., Node.js, Python, Java, etc.) based on your requirements.
Under the permission tab select the Execution role in this select the first option which automatically creates a role with the necessary permission to run the function.
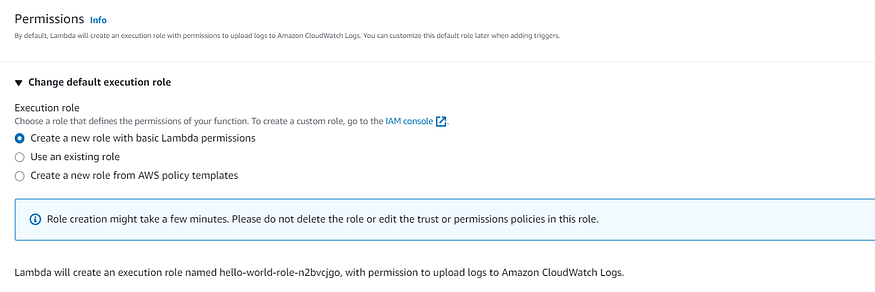
And click on Create function it will automatically generate a sample code. In this article, we will be using this sample code only but if you have your code you can add it by clicking on “Upload from” and selecting a ZIP file containing your sample code. Once added click on “Save” to save the changes to your Lambda function.

Step 2: Create a GitLab repository
Create a new repository on GitLab or use an existing one. This repository will host your application’s source code.

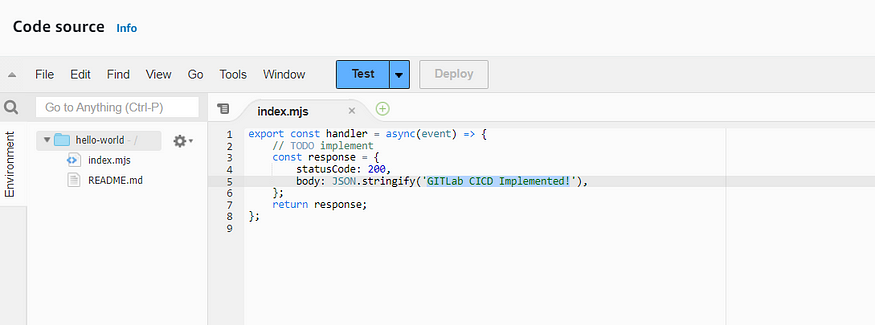
This is the sample GitLab repository created for implementing the CICD. There is the same sample code of the lambda function created in the previous step. Just change the message to “GITLab CICD Implemented” so that we got to know that changes are getting deployed to AWS Lambda Function.

Step 3: Create Access Keys in AWS
Go to the “IAM” (Identity and Access Management) service from the console’s search bar or find it under the “Security, Identity & Compliance” category.
Locate the “Users” tab on the left-hand side and click on it. This will display a list of IAM users in your AWS account. From the list of IAM users, find and select the user for whom you want to create access keys and who has all the permissions to run the resources in the AWS account. Click on the user’s name to open their user details page.

On the user details page, you will find multiple tabs. Click on the “Security credentials” tab to access the security-related settings for the selected user.

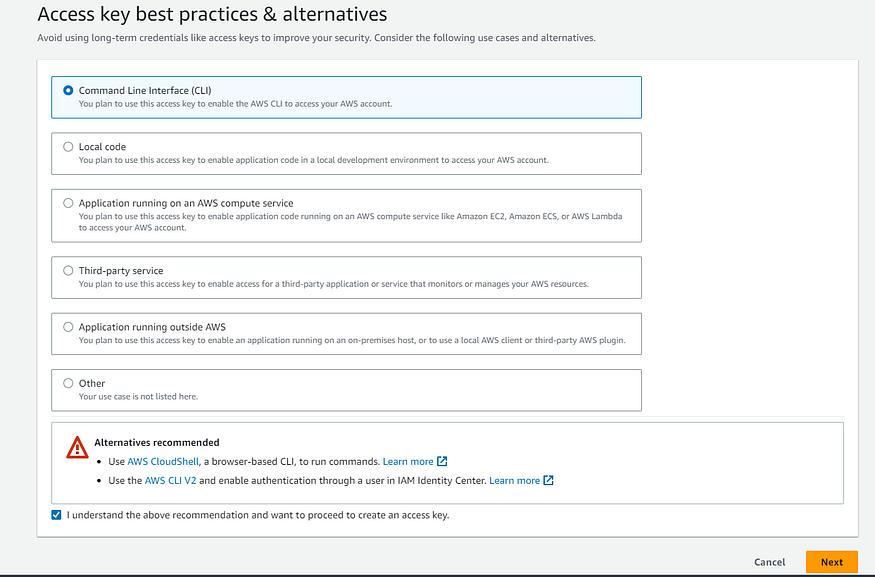
Scroll down to the “Access keys” section and click on the “Create access key” button. A dialog box will appear with the newly generated access key and secret access key. Select the first option and check the “I understand permissions” box below and click on Next and create the access keys.
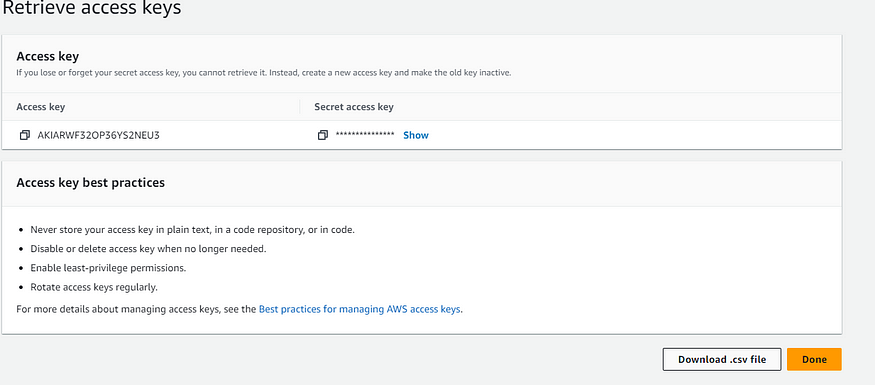
Now, Click on the “Download .csv file” button to download the access keys in a CSV file format. Make sure to securely store this file or the access keys themselves, as they grant programmatic access to your AWS account.
Step 4: Configure the AWS Credentials on GitLab Project
To interact with AWS services during the pipeline, we need to configure AWS credentials on our GitLab Project. We will set the environment variables to provide the necessary access keys to build the pipeline.
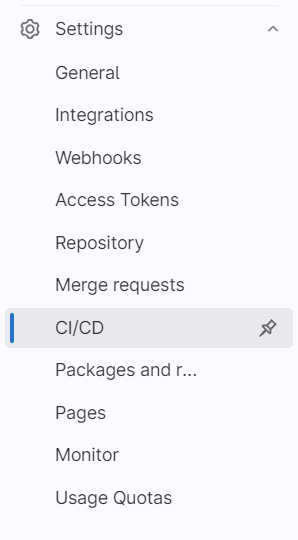
On the GitLab project homepage, click on the “Settings” tab located on the right-hand side of the navigation bar. In the project settings, select the “CI/CD” section from the left-hand sidebar. This section contains settings related to the CI/CD pipelines for your project.
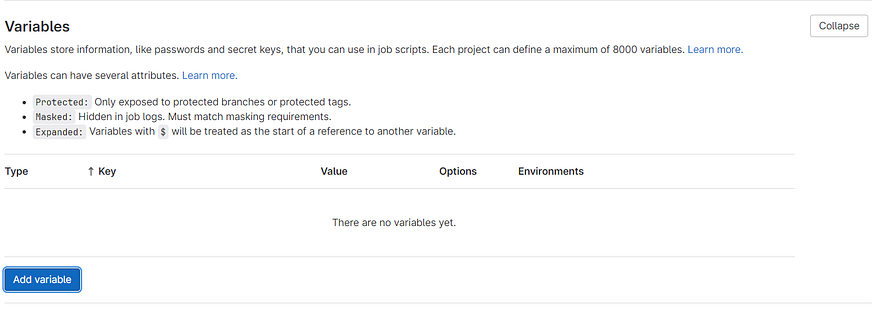
Now, Scroll down to the “Variables” section and click on it to expand the settings. Click on the “Add variable” button to create a new variable that will hold your AWS credentials.
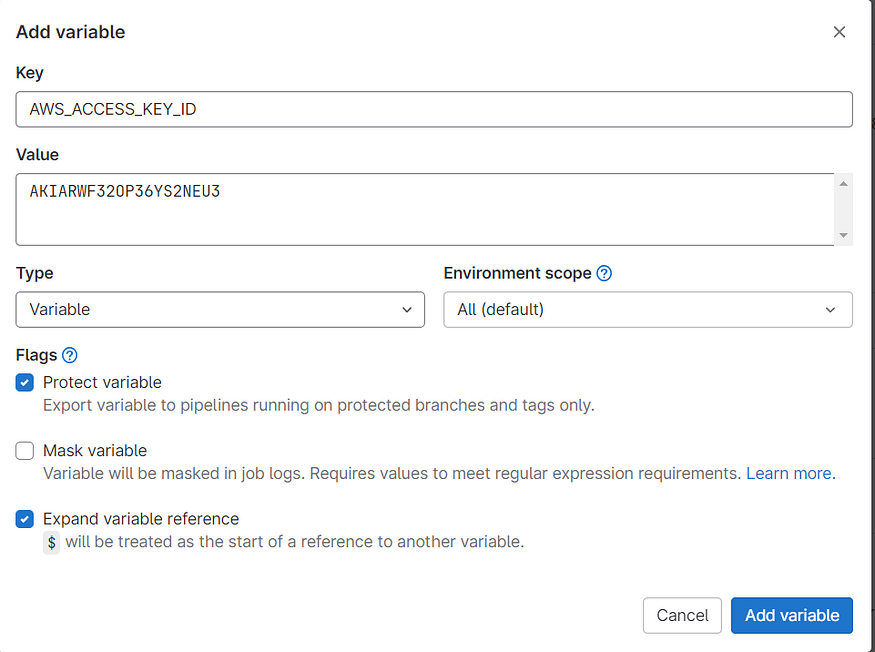
In the “Key” field, provide a name for the variable, “AWS_ACCESS_KEY_ID” In the “Value” field, enter the corresponding AWS access key value. Make sure to select the “Protected” checkbox to ensure the variable is securely stored and then click on Add variable.
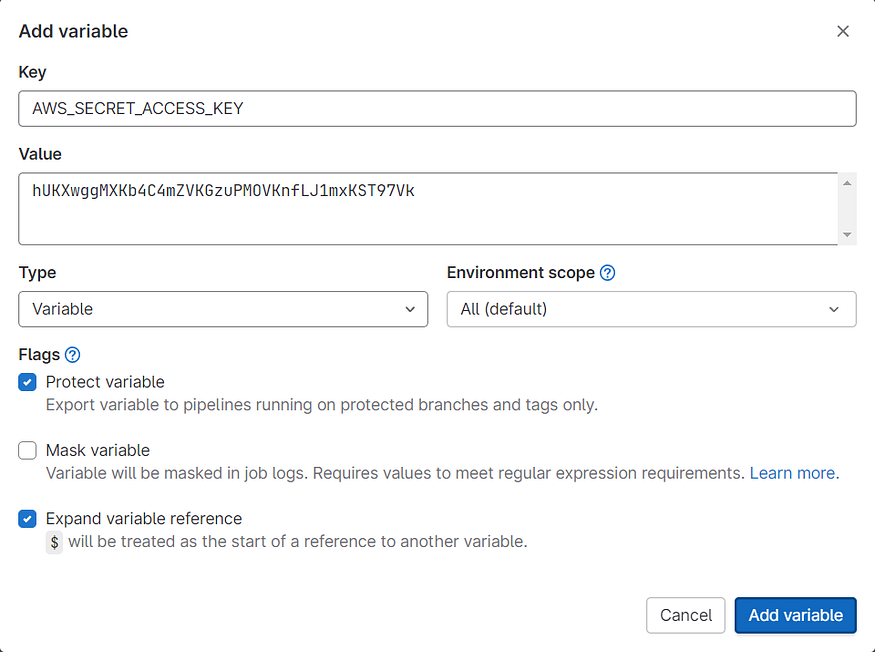
Again, click on the “Add variable” button to create another variable for AWS secret access key. In the “Key” field, provide a name for the variable, “AWS_SECRET_ACCESS_KEY”. In the “Value” field, enter the AWS secret access key value. Make sure to select the “Protected” checkbox to ensure the variable is securely stored and then click on Add Variable.
Now, after adding the environment variables we will create the CICD pipeline configuration file which will deploy the newly committed changes to the AWS Cloud. And don’t worry I will delete the access keys before publishing this article 😊
Step 5: Create and Configure the CICD Pipeline.
In this step, we will create a configuration file named “.gitlab-ci.yml” in the project. This file will define the stages and jobs of our CI/CD pipeline. Each stage represents a logical step in your pipeline, and each job represents a task to be executed.

Copy and paste the following content to the .gitlab-ci.yml file and add some changes like changing your region to your region and changing the lambda function name in the lambda update command in this case it is hello-world.
stages:
    - archiving
    - deploy

archive:
    stage: archiving
    only:
        - main
    image: ubuntu
    when:
        on_success
    before_script:
        - apt-get update
        - apt-get install zip -y
    script:
        - zip -r $CI_PROJECT_NAME.zip .
    artifacts:
        paths:
        - $CI_PROJECT_NAME.zip

deploy:
    stage: deploy
    image:
        name: amazon/aws-cli
        entrypoint: [""]
    script:
        - aws --version
        - aws configure set region ap-south-1
        - aws lambda update-function-code --function-name hello-world --zip-file fileb://$CI_PROJECT_NAME.zip
Explanation of the steps involved in the CI/CD pipeline.
Define stages: The
stagessection specifies the different stages of the pipeline. In this case, there are two stages: "archiving" and "deploy". Stages represent the logical steps or phases of the CI/CD process.Archive job: The
archivejob is part of the "archiving" stage. It is configured to run only on themainbranch (only: - main) but you can change it according to your branch. This job is using theubuntuDocker image, updates the system, installs theziputility, and then zips the project files into a zip archive ($CI_PROJECT_NAME.zip). The resulting zip file is then defined as an artifact to be stored and made available for the further stage i.e.deploy.Deploy job: The
deployjob is part of the "deploy" stage. It uses theamazon/aws-cliDocker image, which comes pre-installed with the AWS CLI. The job begins by displaying the AWS CLI version (aws --version). It then configures the AWS CLI to use theap-south-1region (aws configure set region ap-south-1). Finally, it deploys the zipped project ($CI_PROJECT_NAME.zip) to the AWS Lambda function namedhello-worldusing theaws lambda update-function-codecommand.
The steps demonstrate a basic CI/CD pipeline that archives the project files and then deploys them to the AWS Lambda function. The pipeline will trigger when changes are pushed to the main branch. The archive job will run first, followed by the deploy job. The resulting zip file from the archive job is used as input for the deploy job, allowing for seamless deployment to AWS Lambda.
Now, Once we configured our pipeline settings and defined the stages and jobs in the .gitlab-ci.yml file, commit the file and push the changes. This action triggers the GitLab pipeline and starts the CI/CD process.
To check this navigate to the GitLab project’s CI/CD section to monitor the progress of the pipeline. Here, we can view the status of each stage and job, along with any logs or output generated during the execution. You can also access detailed pipeline and job-specific information and troubleshoot any issues that may arise.
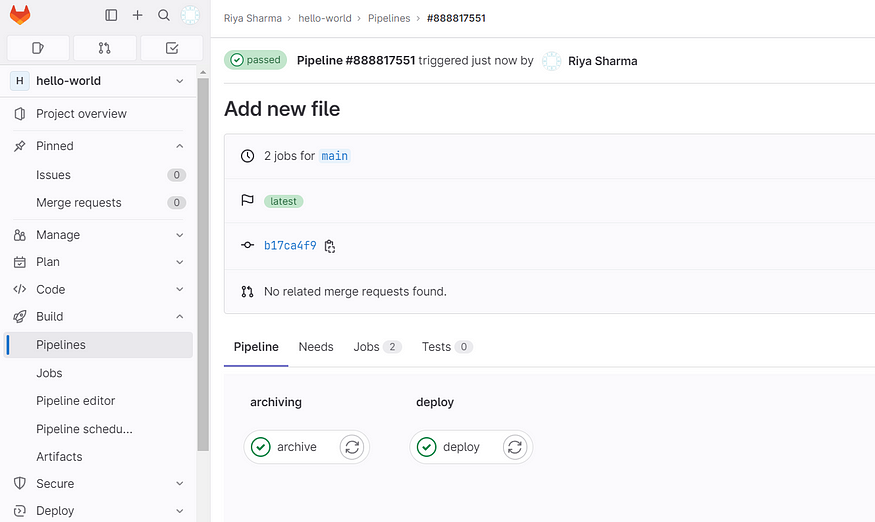
After successfully running the two stages go back to the AWS Lambda function and see the code for the newly deployed code. If you remember in the previous step we changed the message in the GitLab project check it’s deployed now.
So, congratulations 🎊 you have successfully created the CICD pipeline in GitLab for your code deployed in the AWS Lambda function.
Conclusion:
By following these steps, we have set up a CI/CD pipeline using GitLab on AWS, enabling automated builds, and deployments. But remember to adjust the pipeline configuration and steps based on your specific requirements and technology stack.
Follow-up
If you enjoy reading and would like to read more in the future. Please subscribe here and connect with me on LinkedIn.
You can buy me a coffee too🤎🤎🤎


